Managing Service
IDHub allows you to create your own custom service request and use the service request accordingly. This document would elaborate on how you can create your own custom service request.
How can you create a custom Service Request?
- Click on ‘
Services' menu in the Admin Module of IDHub using the credentials of a user that has the role of 'System Administrator' with them. To learn more about IDHub roles, click here - The services page would open for you.
- Click on the
Create Servicebutton to start creating the service request.
What are the details that you need to enter to create a Service Request?

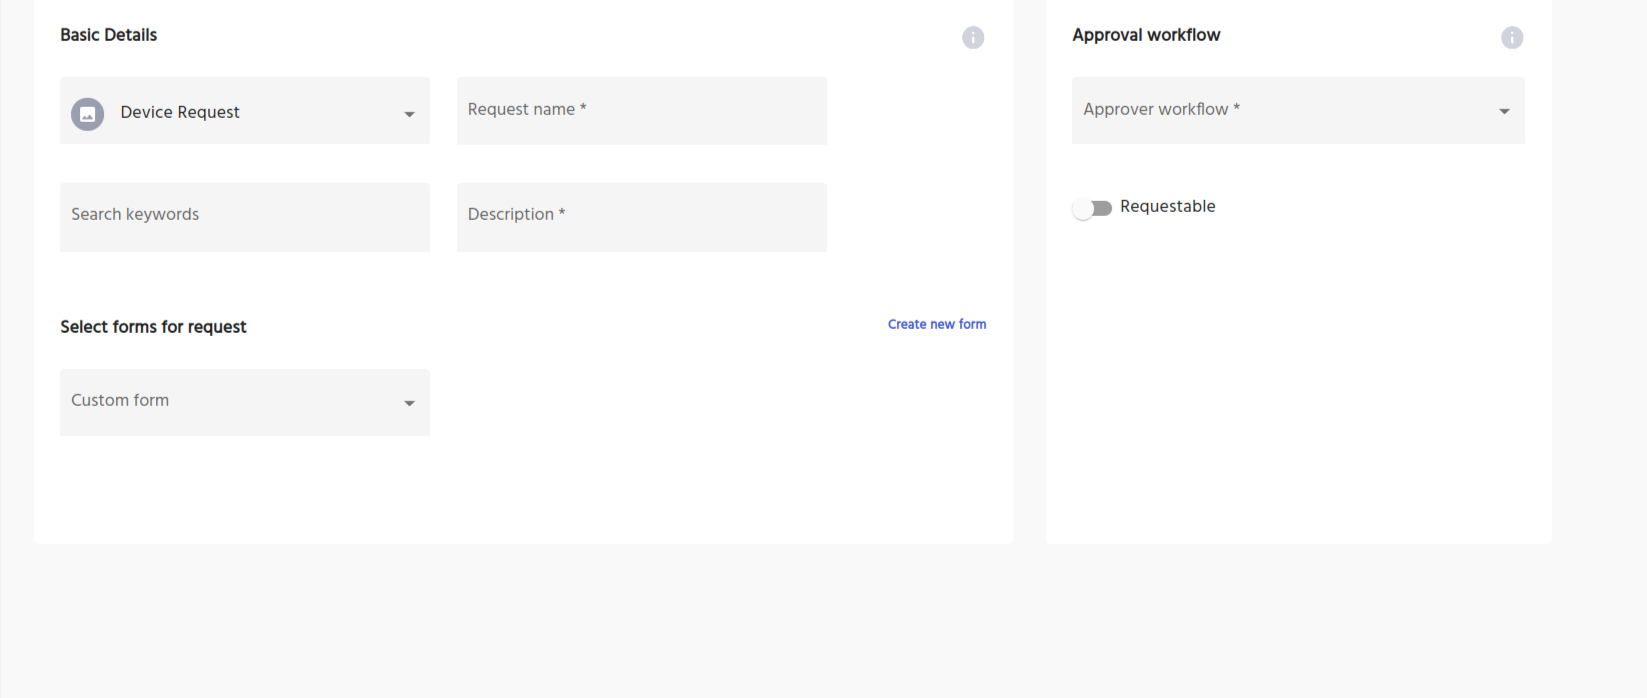
In this section, you need to enter some basic information about the service request which are as follows:
Service Request type- IDHub provides some out-of-the-box Service request types which you can choose from the dropdown
Request name- This is the Service Request name whose information is being entered into IDHub
Description- You can enter some description for the Service Request you are on-boarding for better user understanding
Search keywords- Here you can enter some keywords for the Service Request which will aid in robust searching
Form- Here you need to choose a custom form for the service request that you are onboarding. There is also the link for creating a new form which you can click to create a new custom form. [Click Here](What is Application/How_To_Use_Custom_Forms.md) to learn more about Custom Forms and how to create them.
Approval Workflow- Here you need to choose what is the approval workflow for the Service Request that you are onboarding. IDHub provides you with some out-of-the-box workflow which you can select from the dropdown. You can also easily customize the pre-loaded workflows or create your custom workflow as per your business needs.
Requestable- This serves to determine if the Service Request is available to end users for manual requests.
After entering all the above information, you need to click on the Submit button. Then you need to write a justification for the Service Request creation and then hit the button again. The service request would be successfully created.
Understanding the approval process for the creation of service requests.
After entering all the required information, the request is submitted for approval to the ‘Access Manager' of IDHub.
This approval and onboarding process is managed by an OOTB workflow named ‘Access Manager Workflow’
Access Manager upon going to the ‘Tasks' page upon logging into IDHub can Claim and Approve the task.
Post approval, the service request is successfully onboarded. The newly added service request can be viewed in the ‘Search Catalog' section of IDHub after approval
How you can use a custom service request?
- Goto
IDHub User App(Click on the down arrow at the top left corner and then click on User App) - Click on
Search Catalogin the left menu and then click on theServicesTab. - You will find your newly created Service Request there.
- You can add the service request to the cart for requesting access to the same. Click here to learn more about how you can request access to items.
How to manage your service requests?
- Click on ‘
Services' menu in the Admin Module of IDHub using the credentials of a user that has the role of 'System Administrator' with them. - The services page would list all the Services Requests which is on-boarded for your tenant.
Actions possible for each Service Request
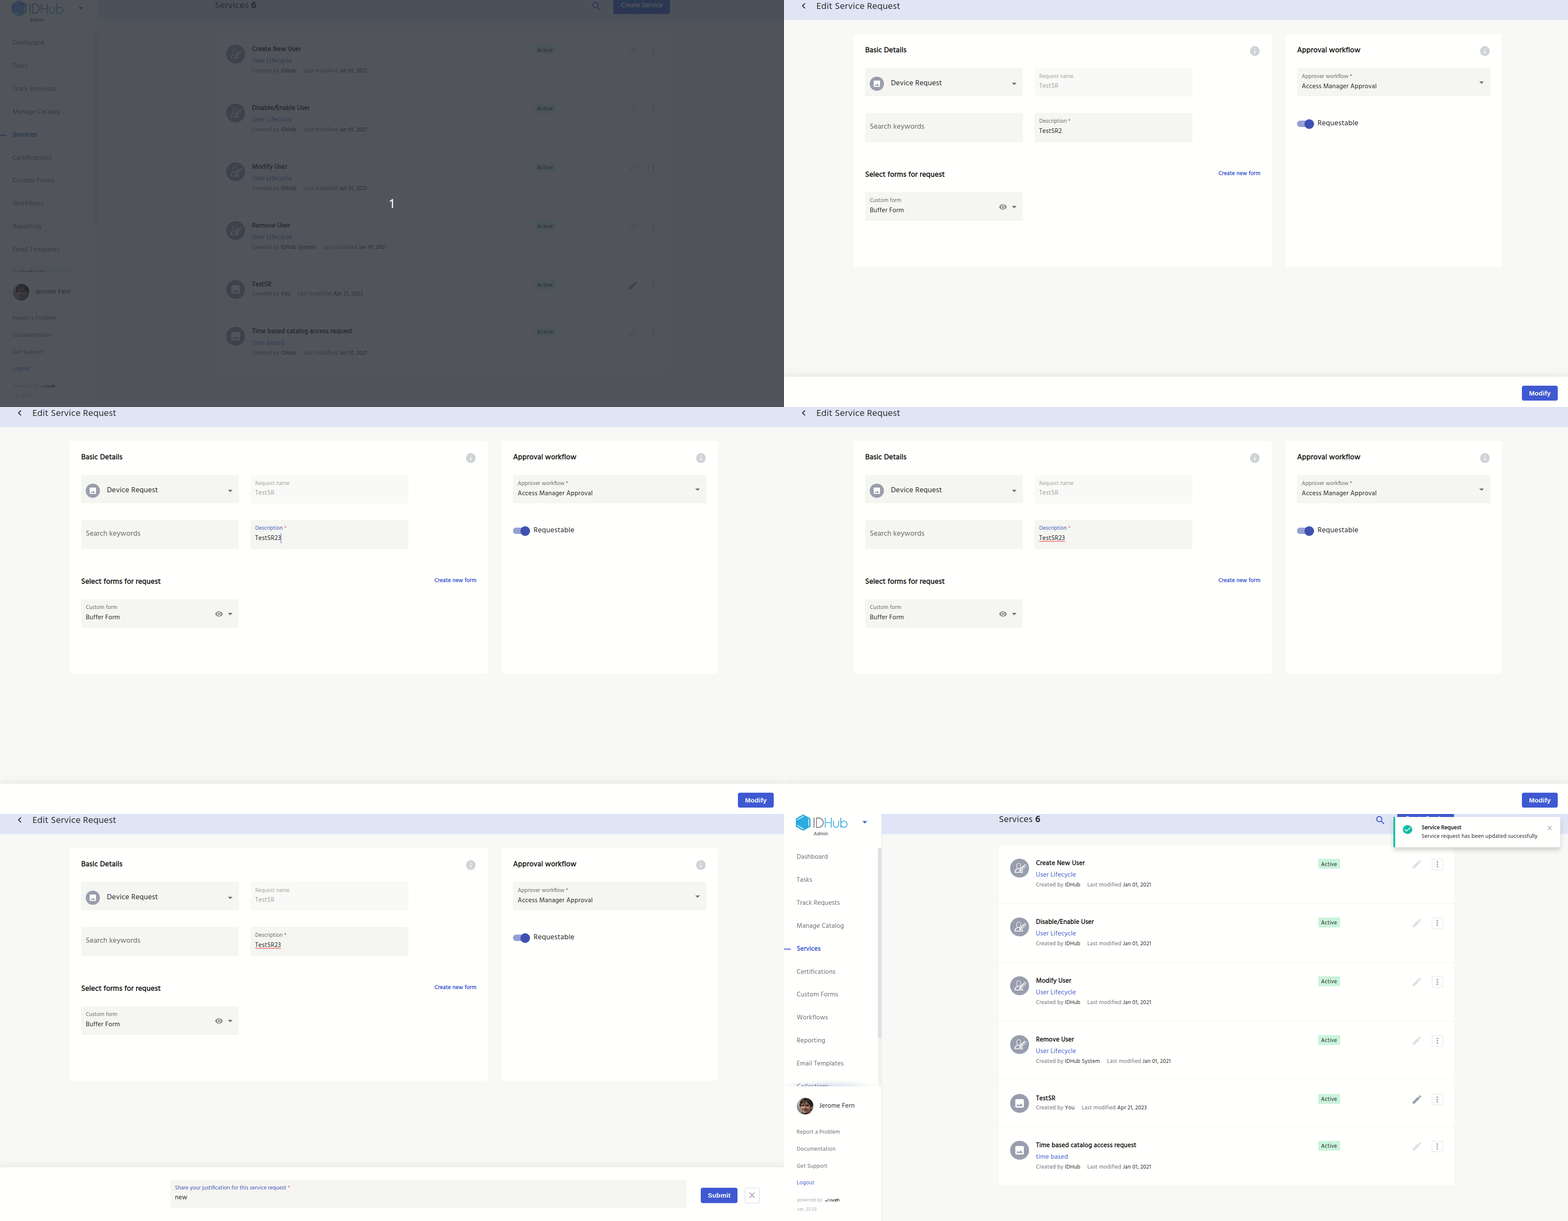
Modifying your Custom Service Request
Click on the edit icon for the service request which you want to modify Or you can also click on the card of the service request which you want to modify and then click on the edit button at the bottom of the page. This would bring you the modification screen of the service request, where you can change the information/details of the service request and then click on the modify button at the bottom.

Again the request would be submitted to Access Manager for approval. Once approved by the Access Manager, the Service request would be modified accordingly.
Enable/Disable Service Request
- Click on the 3 dots menu for the service request which you want to disable and then click on the disable menu.
- You can also disable the service request by clicking on the service request card, which would bring the service request details pages. At the bottom of the page click on the disable menu in order to disable the service request.

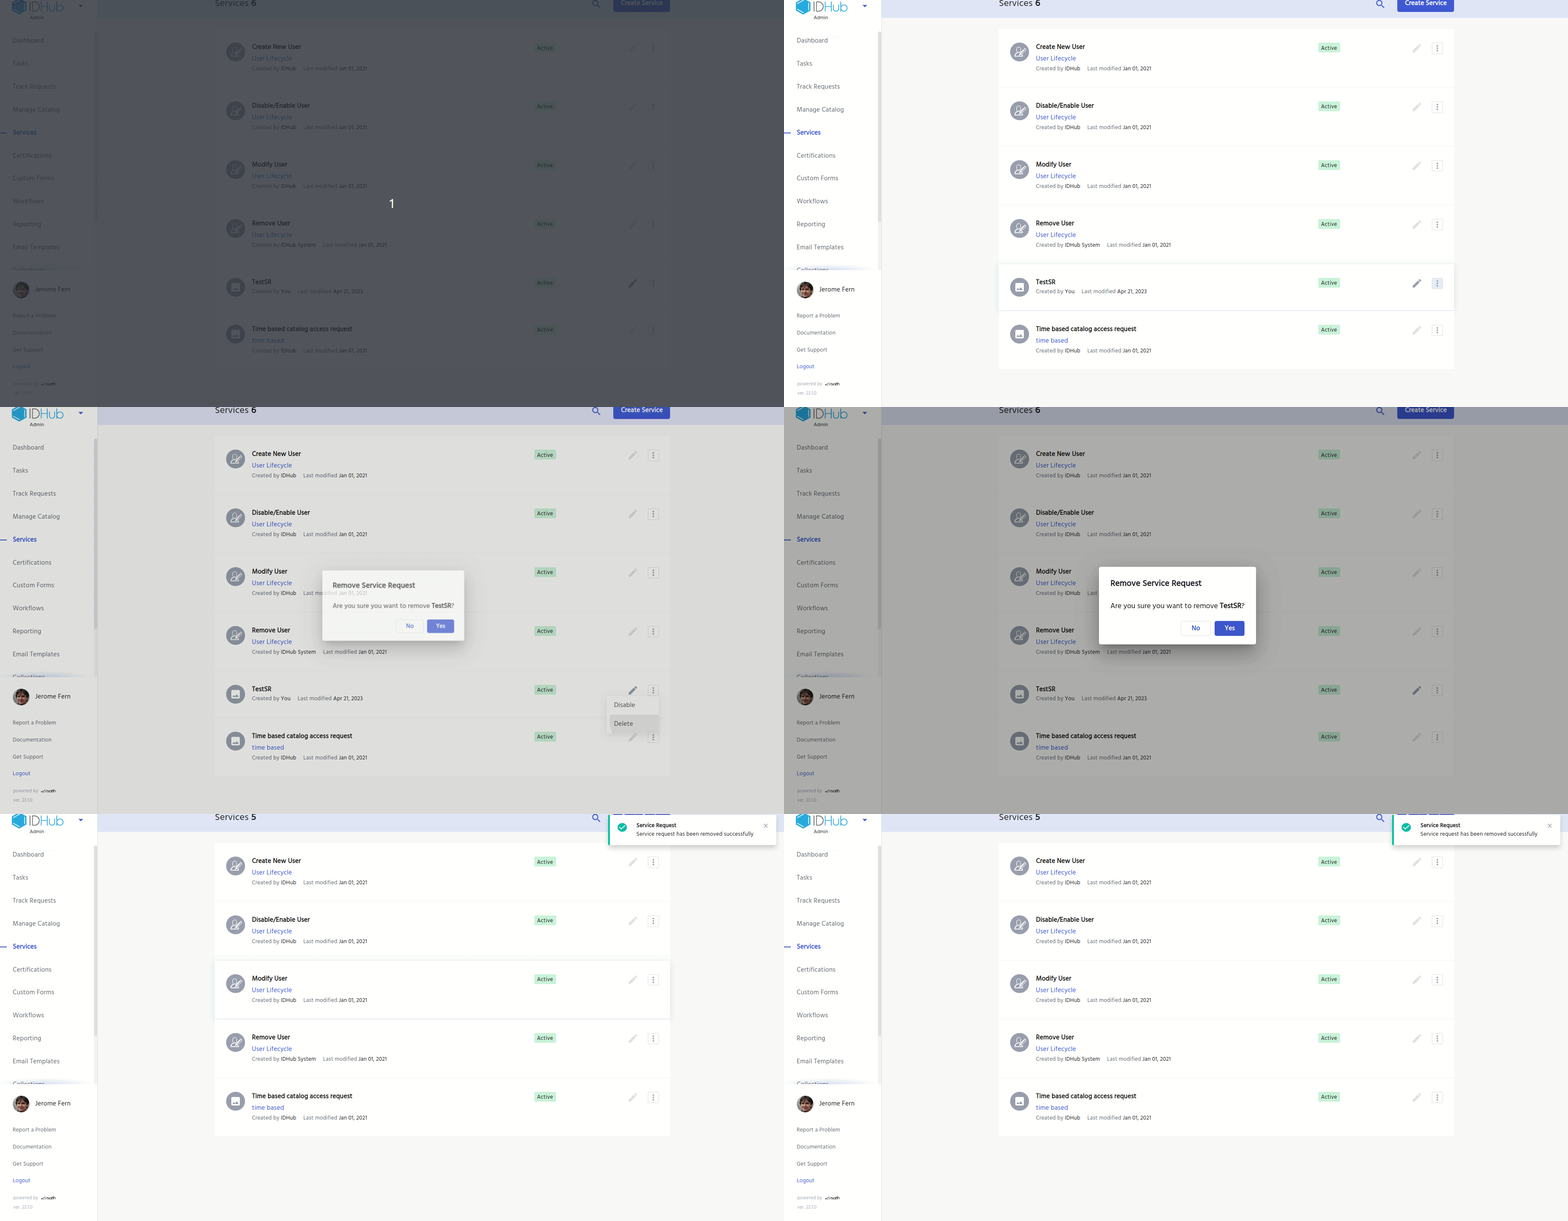
Remove Service Request
- Click on the 3 dots menu for the service request which you want to remove and then click on the delete menu. This will bring up a confirmation box, clicking on the
yesbutton in the confirmation box would delete the service request. - You can also delete the service request by clicking on the service request card, which would bring the service request details pages. At the bottom of the page click on the delete menu in order to delete the service request.
